
Table of Contents
Bearded dragons are fascinating reptiles that can make great pets for people who love exotic animals. They are also relatively easy to breed, and many owners enjoy watching their bearded dragons lay eggs and hatch into adorable baby beardies. However, incubating bearded dragon eggs requires some preparation and care to ensure a successful outcome. In this post, we will guide you through the steps of how to incubate bearded dragon eggs at home.
What You Need
Before you start incubating your bearded dragon eggs, you need to gather some supplies and equipment. Here is a list of what you need:
- A nest box for your female bearded dragon to lay her eggs in. This can be a plastic container filled with moist substrate, such as vermiculite, perlite, or soil. The container should be large enough for your beardie to turn around and dig in, and deep enough to cover the eggs.
- An incubation box for the eggs. This can be another plastic container with a tight-fitting lid and small holes for ventilation. You also need to fill it with moist substrate, similar to the nest box.
- An incubator for the incubation box. This can be a store-bought or DIY incubator that can maintain a constant temperature and humidity level for the eggs. You also need a thermometer and a hygrometer to monitor these conditions inside the incubator.
- A marker or a pencil to mark the top of the eggs. This is important to prevent the eggs from rolling or turning during incubation, which can harm the developing embryos.
What You Do
Once you have everything ready, you can follow these steps to incubate your bearded dragon eggs:
- Provide a nest box for your female bearded dragon. When your beardie is gravid (pregnant), she will show signs of nesting behavior, such as digging, basking, and being restless. This usually happens 4-6 weeks after mating. You should place the nest box inside her enclosure and let her choose a spot to lay her eggs. She may lay up to 30 eggs in one clutch.
- Remove the eggs from the nest box. After your beardie lays her eggs, she will bury them or partially bury them in the substrate. You should carefully dig them out and gently lift them with your fingers or a spoon. Do not turn or roll the eggs, as this can kill the embryos inside. Use a marker or a pencil to mark the top of each egg so that you can keep them in the same orientation throughout incubation.
- Prepare the incubation box and the incubator. Add moist substrate to the incubation box and make small indentations for each egg. Place the eggs in the indentations, keeping them at least an inch apart from each other. Put the lid on the box and make sure it is secure. Set up your incubator according to its instructions and adjust it to maintain a temperature of 80-85°F (27-29°C) and a humidity of 75%. These are the ideal conditions for bearded dragon egg incubation.
- Place the incubation box inside the incubator. Check that the thermometer and hygrometer are working properly and that they show the correct readings. Put the incubation box inside the incubator and close it tightly.
- Monitor the eggs during incubation. You should check on your eggs daily and make sure that they are healthy and safe. Look for signs of mold, fungus, dehydration, or collapse. If you see any of these problems, you should remove the affected eggs and dispose of them safely. You should also check that the temperature and humidity are stable and within range. If they fluctuate too much, you may need to adjust your incubator settings or add more water to the substrate.
- Prepare for hatching. Bearded dragon eggs usually take 40-90 days to hatch, depending on the temperature. As they get closer to hatching, you may notice some changes in their appearance, such as dimpling or sweating. These are normal signs that indicate that the embryos are moving inside. You should not disturb or help them hatch unless they are stuck or in distress. When they hatch, they will cut through their shells with their egg tooth. This is a small protrusion on their upper jaw that helps them break out of the egg. It will fall off after a few days.
- Watch for signs of hatching. As the eggs get closer to hatching, you may notice some changes in their appearance. They may start to dimple, sweat, or collapse. These are normal signs that indicate that the embryos are moving inside and preparing to hatch. You may also hear some chirping sounds from the eggs.
- Do not disturb or help the hatchlings. When the eggs start to hatch, you will see small slits or holes on the shells. This is where the baby beardies use their egg tooth to cut through. The hatching process can take several hours or even days, so you should not interfere or try to help them out. Let them hatch at their own pace and avoid touching or moving them until they are fully out of the shells.
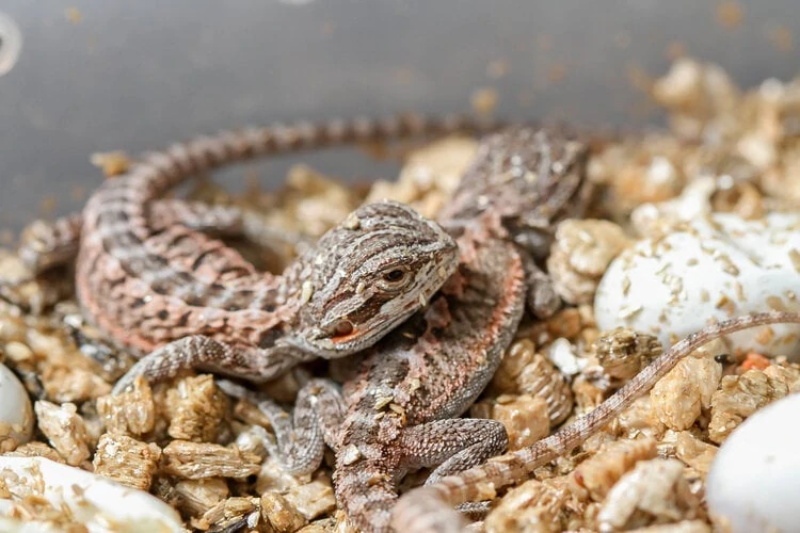
- Remove the hatchlings and the egg shells. Once the hatchlings are out of their shells, they will look wet and wrinkled. They will also have a yolk sac attached to their belly, which will provide them with nutrients for the first few days. You should carefully remove them from the incubation box and place them in a separate enclosure with a heat lamp, a water dish, and some paper towels as substrate. You should also remove any egg shells or unhatched eggs from the incubation box and dispose of them safely.
- Care for the hatchlings. The baby beardies will need some time to adjust to their new environment and start eating on their own. They may not eat for the first few days, but you should offer them small insects and greens daily. You should also mist them with water twice a day to keep them hydrated. Make sure to monitor their temperature, humidity, and health closely and consult a vet if you notice any problems.
- Enjoy your new beardies! Congratulations! You have successfully incubated and hatched your bearded dragon eggs. You can now enjoy watching them grow and develop their own personalities. Bearded dragons can live up to 10 years or more with proper care, so you have a long time to bond with your new pets.

Potential Problems
Incubating bearded dragon eggs is not without risks. There are some potential problems that you may encounter along the way. Here are some of them and how to deal with them:
- Egg binding: This is when a female bearded dragon cannot lay her eggs due to stress, dehydration, lack of calcium, or other health issues. This can be fatal if not treated promptly by a vet. Signs of egg binding include lethargy, loss of appetite, swelling of the abdomen, straining, or dragging of the hind Legs.
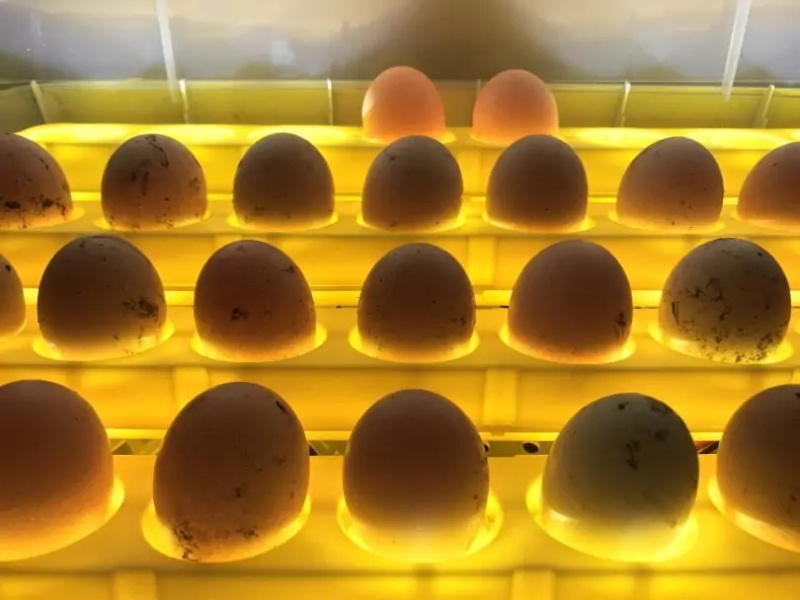
- Infertility: This is when a female bearded dragon lays eggs that are not fertilized by a male. Infertile eggs will not develop or hatch into baby beardies. You can tell if an egg is infertile by candling it with a flashlight. Infertile eggs will look clear or yellowish, while fertile eggs will have red veins or dark spots inside.
- Mold: This is when a fungus grows on the surface of the eggs due to excess moisture or contamination. Mold can prevent oxygen from reaching the embryos and cause them to die. You can prevent mold by keeping the substrate moist but not wet, using sterile materials, and removing any rotten or broken eggs. You can also wipe away any mold with a damp cloth or cotton swab dipped in water or vinegar.
Conclusion
Incubating bearded dragon eggs can be a rewarding experience for any reptile lover. It can also be challenging and require a lot of patience and care. By following this guide, you can increase your chances of having healthy and happy baby beardies.
I hope you found this post helpful and informative. If you have any questions or comments, please feel free to leave them below.